
Connect over SSH
Connect to a server using a private key that stays on your phone. This walkthrough creates a key named staging-ssh, registers its public key for a server account, and uses it to read the server’s hostname.
You need a paired computer, an SSH client, and an account on a server where you can register an SSH public key. Replace deploy@staging.example.com below with that account and server.
Create and register the key
Section titled “Create and register the key”On your phone, open Secrets → New secret. Choose SSH key, name the secret staging-ssh, and use Generate new key with Ed25519. Select Generate and review, review the public-key preview, then Create secret. Keep its approval setting at Ask for this first connection.
Open the saved secret and choose Copy public key. Register the complete public-key line for your server account using its administration interface or an existing authenticated connection. On a conventional SSH server, the account’s authorized keys are stored in ~/.ssh/authorized_keys.
To get the public key directly on the paired computer, use agentknock secret list. With jq installed, you can extract it into a public-key file:
agentknock secret list | jq -er '.secrets["staging-ssh"].public_key' > staging-ssh.pubRegister the contents of that file just as you would the line copied from the phone. This does not export the private key.
Only the public key is needed on the server. Agentknock will use the matching private key on your phone when SSH asks to authenticate.
Use a key already on your computer
Section titled “Use a key already on your computer”If you already have a working SSH key, you can import it instead of generating a new one. Start with an unused secret name; the following example assumes you have not created staging-ssh yet.
For a passphrase-protected OpenSSH key, run:
agentknock secret upload staging-ssh \ --from-ssh-key ~/.ssh/id_ed25519 --passphrase-promptEnter its passphrase at the hidden prompt. For an unencrypted key, omit --passphrase-prompt. The CLI decrypts a protected key locally and sends the private key through the encrypted upload; it does not send the passphrase.
When the CLI reports delivery, open Secrets → Incoming uploads on the phone. Check the proposed name and public-key fingerprint, then select Approve. The key becomes usable only after that decision. Keep its mode at Ask for the connection below.
If the server already accepts this same public key, no new server registration is needed. Uploading leaves the original private-key file on the computer. Keep it until you have confirmed that the phone-held key works, then remove any local copy you no longer intend to use. For input formats and update options, see the SSH upload reference.
Start a connection
Section titled “Start a connection”On the computer, run:
agentknock -s staging-ssh --verbose --no-ssh-passthrough \ --reason "Read the staging server hostname" \ -- ssh -o IdentityAgent=SSH_AUTH_SOCK deploy@staging.example.com hostnameIdentityAgent=SSH_AUTH_SOCK tells OpenSSH to use the agent supplied for this command. --no-ssh-passthrough leaves other keys from your usual SSH agent out of that agent. The hostname argument asks the server to run one command and then close the connection.
On a first connection, SSH may ask you to verify the server’s host-key fingerprint. Check it against the fingerprint supplied by the server administrator before continuing. This is SSH’s server check, separate from the approval on your phone.
Agentknock first obtains the public key and starts SSH. This initial request needs no protected-value approval. When SSH uses that key to authenticate, a separate SSH authentication request arrives on your phone. Among the verbose messages, you will see:
AGENTKNOCK: Waiting for the device to approve SSH authentication.Approve the authentication
Section titled “Approve the authentication”Open the request from its notification or Requests. Check the client, staging-ssh key, remote account, and triggering command. For this example, the account should be deploy and the command should ask for hostname on your server.
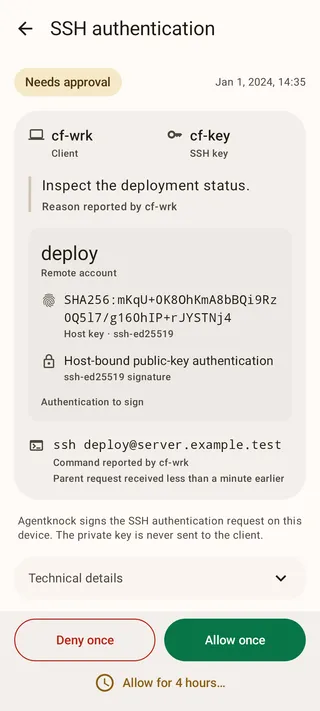
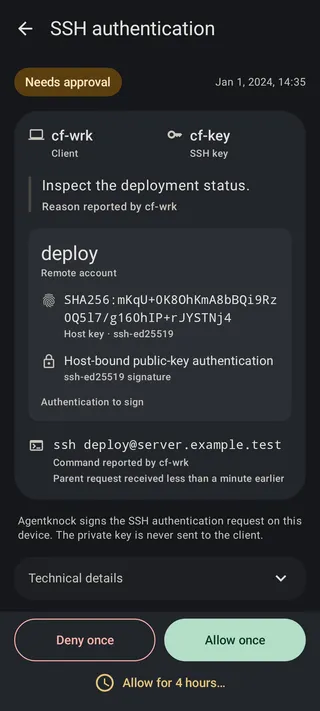
With host-bound authentication, the request includes the server’s host-key fingerprint. Ordinary public-key authentication does not include that identity; the app explains when it cannot identify the server from the signed message. The hostname in the command is reported by the client.
Tap Allow once. The phone signs this authentication request and returns the signature. The terminal then reports:
AGENTKNOCK: SSH authentication response received. Confirming receipt.AGENTKNOCK: SSH authentication request complete.SSH should print the server’s hostname and exit. The phone’s delivery result confirms the signature exchange; the hostname output confirms that the remote command ran. Every AGENTKNOCK: line comes from Agentknock, while SSH and the remote command keep their normal output.
Continue or stop
Section titled “Continue or stop”Run the command again without hostname to open an interactive SSH session. A new authentication using the phone key needs a new decision under Ask. The same integration works for git fetch over SSH after registering the key with the Git host.
If no phone request appears, SSH may have used a local key file or another authentication method. --no-ssh-passthrough excludes other agent keys; it does not disable those other methods. Review your SSH identity settings using the CLI SSH reference.
Deny once refuses the phone signature, though SSH may try another available method. Ending access on the phone does not terminate an SSH session already authenticated. To remove this key’s access at the server, remove its public key there.